too
dark in here and too bright out there, impossible to photo - not now:
high dynamic range [HDR] pics
“Increase the dynamic range of your photos.
“If you have ever photographed a high contrast scene, you know
that selecting the correct exposure will not avoid blown out highlights
and flat shadows.”
There are several other ‘worked’ examples on
this page.
There are many finished example images at Flickr: the
linked page shows examples and provides many links to more images.
This
FAQ page explains the principles and the process used to make pictures
like the right-hand one above.
“Tone mapping algorithms scale the dynamic range down while attempting
to preserve the appearance of the original image captured. Tone mapping
operators are divided into two broad categories, global and local.
- “Global operators
Map each pixel based on its intensity and global image characteristics,
regardless of the pixel's spatial location. An example of a global type
of tone mapping is a tonal curve.
Global tone mapping is OK for processing 12-bit sensor data but usually
does not produce photographically pleasing images when applied to 32-bit
HDR images. This is because all pixels of the image are processed in
a similar way, regardless of whether they are located in a bright or
dark area. This often results in a tone mapped image that looks "flat",
having lost its local details in the conversion process.
- “Local operators
Take into account the pixel's location in the image in order to determine
the appropriate scaling for this pixel. So, a pixel of a given intensity
will be mapped to a different value depending on whether it is located
in a dark or bright area.
Local tone mapping requires looking up surrounding values for each pixel
mapped, which makes it slower (memory access is the major speed bottleneck
on today's computers) but tends to produce more pleasing results (our
eyes react locally to contrast). If correctly done, this results in
an image preserving local contrast as well as details in highlights
and shadows, as shown on those
examples.”
In other words, having taken a number of photos of
the same view, but with different exposure times, the best exposed parts
of the different photos are melded together to make a well-lit final picture.
The result can be so highly defined that is reminisant of some Pre-Raphaelite
paintings, such as those by John Millais.

The Woodman's daughter by John Evrett Millais,
1851
The software to do this melding, is called Photomatix. There is
a
free trial version to download, or
“Photomatix Pro is a stand-alone program that runs on Mac OS
X and Windows 98/Me/2000/XP. The Tone Mapping tool is also available
separately as a plugin compatible with Photoshop CS2.
“One license for Photomatix Pro costs US$99 or €79. One license
for the Tone Mapping Plug-In costs US$69 or €55.” [order
page]
Lead from Limbic
abelard.org test-drives photomatix 
While the
software insists that you feed two photographs to it in order for
it to do its magic, in my view this is not the best way to use this software.
Here’s what you should do:
- Take a single image and make a copy with a different name in the same
folder.
- In the “Generate HDR” window, select just those two copies
of the same image (the original and the one you have just made).
- Generate and adjust the image as usual.
This method fools the software into thinking it is
using multiple images. Using two separate photographs would require at
least using a tripod. As you can see below, the results do not suffer.
This software allows you to create various moods of
a single scene/photograph rather similar to the famous series of paintings
produced by Monet [eg his
Rouen Cathedral series].
tone mapped high dynamic range image
Here are a few versions the auroran sunset
made from some of his photographs:

original deliberately under-exposed version (I took a whole series
ranging from over to under exposed, as the tutorials advised!).
|

version adjusted for vivid colours and broody clouds.
|

version adjusted for vivid, but almost natural colours.
|

candyfied version.
|

brighter and less detailed candy-colour version.
|

desolate wasteland version.
|

adjusted version where the colours almost match reality.
|

adjusted version with ‘concentric’ rings of colour.
|

adjusted to look like a “snow queen”’s land.
|

adjusted to look as if a storm is coming in.
|

adjusted from a deliberately *over*-exposed version of the same shot.
|

my original photograph.
|

adjusted for candy-bright colours.
|

adjusted to a darker, veinier type of flower.
|

now the flowers are dying!
|

adjusted so the background leaves show properly.
|

original photograph of me and a friend.
|

souped-up version.
|

screenshot of the tone mapping adjustment screen. |
Having now downloaded this program and played with
it a bit, we are going to award it Four GoldenYaks (tm) as one of the
most useful pieces of photo manipulation software we have come across.
The program is particularly useful for two of our main photographic interests:
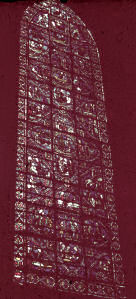
stained glass, where the light contrast between the windows and the building
structure are very great, and macro close-ups of flowers etc, where again
there is a great contrast between the surface and more ‘hidden’
background foliage.
Another problem with macro photographs is very low
depth of field. With the
latest advanced digital cameras, this sort of photography is becoming
easy-peasy lemon squeezy compared with the array of equipment and setup
times of the past.
This software also has functionality for something
it calls “exposure blending”.
how to do it all, including exposure
blending -
the auroran sunset :
Below is a worked example using Photomatix’s
exposure blending function, followed by HDR and tone mapping. Note that
the software writers clearly did not have this sort of manoeuvre in mind
when they wrote it, otherwise the Generate HDR screen wouldn’t baulk
at creating an HDR from a single image.
On an earlier trip to Lyon cathedral, before I knew
about this software, I tried an experiment: I took one photograph exposed
for a rose window and one photograph exposed for the surrounding building.
I was hoping that I could later find some way to Photoshop the two together.
However, as Photomatix is apparently designed for this sort of thing,
I tried that instead.
 |
 |
| original photograph of Lyon cathedral - exposed for the stonework. |
original photograph of Lyon cathedral - exposed for a rose window. |
Step 1: exposure blending

two photos of Lyon cathedral exposure blended together. |
- From the File menu, open
the images you want to blend, i.e. the two images above.
- Next, click on the Combine
menu and then click on H&S Detail - 2 Images.
- A window will pop
up. Just press OK [I first ticked the align images before
combining box, because as you can see
I hadn’t used a tripod].
That gives the first image. My example is to
the left. It seems to work pretty well, considering that my original
photographs were somewhat overexposed and blurry. Aligning the two
images also seems to have worked without trouble.
The Combine menu has four other
options. The Average option doesn’t
seem to work very well. H&S Detail - Auto, H&S
Detail - Adjust and H&S Detail - Sensitive
sometimes give slightly better results than the H&S Detail
- 2 Images option that I used for this example, but they
are fiddly and take longer to render for not much gain.
The most useful of the three is probably H&S
Detail - Adjust. Notice the slight ‘painted’
effect on the columns in my version. This seems to be a function
of the Radius, which you can set in the window
that comes up if you use the H&S Detail - Adjust
option. The larger the radius, the more like a painting the picture
becomes. You can also set the light level if you use H&S
Detail - Adjust, although for some reason the software
calls this option, “Blending Point”. |
Step 2: making an HDR image

the blended photo turned into an HDR image. |
- First save your blended image using the File
menu. Do this twice, using different file names, so that you can
fool the software into making an HDR image from a single picture.
- Next, click on the HDRI menu
and then click on Generate HDR.
- Click the Browse button and
find and highlight the two copies you just saved with your mouse.
Click Select, click OK.
- An Exposure time setting
window will come up. Ignore it and click OK.
This window doesn't come up if you use images directly downloaded
from a standard digital camera. This is because most modern cameras
automatically and invisibly encode the exposure information in
the image.
- Then appears the Generate HDR - Step
2: Response curve options window. Leave it set to Use
standard response curve (recommended) and click OK.
You now have an HDR image made from the exposure-blended
image you created in Step 1. My example is to the
left. This gives pretty much exactly what I wanted when I took the
pictures (ignoring the blurring of course). |
Step 3: playing with tone mapping

the HDR image souped-up a bit. |
- Click on the HDRI menu, and
on the Tone Mapping option.
- The Tone Mapping window (see
screenshot above) appears, full of weird and interesting knobs
and dials.
- Play! You can watch the results in the preview
window.
- When you are satisfied, click OK.
You now have a tone mapped version of the HDR
image you created in Step 2. In my case, I created
a rather nice ‘medieval sketch’ which is as ever the
image to the left. Notice that my playing seem to have cleared up
most of my camera shake along the way.
The images in the first section
were created using just Steps 2 and 3. |
|


